Monday, January 27, 2020

Do you think I'm odd?

Merry Christmas and Happy New Year ya'll! It's been a crazy few weeks! I spent a week in California with my ENTIRE family and we spent three days at Disneyland. It was SUCH a great time and we made a lot of precious memories. (Also, Bryan and I rode Incredicoaster four times in a row...we had booked fastpasses for everyone...then they all left to take naps...so we didn't want to waste them!) When we got back, I realized there was only a week until Christmas, so I've spent the last week buying gifts and getting ready for THAT (and actually spent a decent amount of time sewing...but more on that later ;) Then we started Seussical rehearsals and things have been a LITTLE crazy.


When we last left off, I had just finished Belle's blue village corset vest. I was SUPER pleased with the way it turned out, but I still had to create the rest of her blue ensemble! (Note: this is not the actual order I made everything in...but we'll visit this now anyway because it makes more sense. I had SO many things to make and not everything was finished before I started something new. I had to take breaks from *certain* pieces so I didn't stab myself in the brain.)


Today we will take a look at Belle's blue skirt and apron. (I forgot to take very many in-progress photos of this skirt, so...oh well.) Again, I was modeling my look after the newest tour version of the show, but this was a pretty simple and modest piece, compared to the vest. Since the vest had a pretty vibrant pattern, I wanted a more muted fabric for the skirt. I was hoping to find something similar to my inspiration fabric, which was kind of like a soft blue with a muted pinstripe...but unfortunately even after searching every fabric store in the valley, I couldn't find anything like that. So I ended up choosing a a bright-ish solid blue cotton quilting fabric. (I needed this thing to be sturdy but still flow well. I was anticipating lots of spinning.)


For this piece I decided to do a simple circle skirt. A circle skirt is basically just a large circle with a smaller circle cut for the size of your waist. Depending on the width of your fabric and the length you want the skirt, you can cut it in two half-circle panels, or four quarter-circle panels. As this was to be a shorter skirt (just below the knee), I was able to do two half-panels for the front and back. I would attach them to each other at the sides and then fasten them to a waistband. I planned on doing a simple zipper and hook and eye fastener at the back. This was the most sturdy and secure way to make sure everything stayed fastened but it was still relatively quick to get in and out of. (EVERY COSTUME CHANGE WAS FAST.)


If I remember right, I was able to cut both panels from my folded fabric. (Most fabric comes folded length-wise, that way you can cut mirror-image pattern pieces). I folded it in half again width-wise so that I could just cut a quarter-circle and then unfold it. I measured my waist (the circumference of the inner circle) and calculated the radius of my waist (the additional length I'd need to cut - for example a 30.5 inch waist plus a half inch seam allowance creates a 31" circumference or a 4.93" radius - I think I gave myself an extra inch to be safe (MATH!)  I could always cut more off, but this fabric wasn't super cheap so I didn't want to waste it. But I also knew I would add a ruffle at the bottom, so if it was a little short that was ok.

I used a measuring tape to create my quarter-circle (Basically held on end on the corner and dragged the other end around and pinned a bunch of dots to create a cutting line. I cut out my folded quarter circles and then cut a smaller circle for my waist. (I had planned on creating the waist a little big so I could put some pleats in it and give it even more volume. I LOVE the way a spinny skirt looks.)

Once I had my panels cut out, I sewed them together at the sides. Since I don't own a serger I did kind of a modified seam. Since this skirt would only be one layer and I didn't want the raw seams to show, I first sewed the wrong sides together to create one seam, then turned it inside out and tucked the seams inside themselves to create a second, hidden seam. Then I pressed the sides and everything looked...well seamless ;)

   Pretend this is blue....(I made the pink one the same way....)
I created my waistband next. This was a simple folded rectangle. I knew it could easily be wrapped around itself so it didn't matter if it was too long. I wanted it to be a decently thick waistband so I could make sure there was no weird waist gap when I raised my arms...I hate that! I think I measured about a 3 inch wide waistband (which I doubled so I could fold in half. I ironed more interfacing on one half -- this would help the fabric not to wrinkle even if it was pulled pretty snug to my waist. Then I folded in the ends and pressed so I didn't have raw edges hanging out, then I folded the entire thing in half, length-wise. The nice folded edge would be the top that would sit against my skin, and I would sew the skirt panels into the bottom edge.

Even though I hadn't exactly decided how I'd do the apron, I knew it would sit on top of the skirt (not in the waistband), so I went ahead and sewed the skirt panels to the waistband. I put a few pleats to make it the same size as my waist, but left the back open as I knew I'd have to size a zipper and leave room for a seam allowance there.

THIS SEAM IS SEWN BY HAND. BE IMPRESSED.
(It's super not professional at all.)
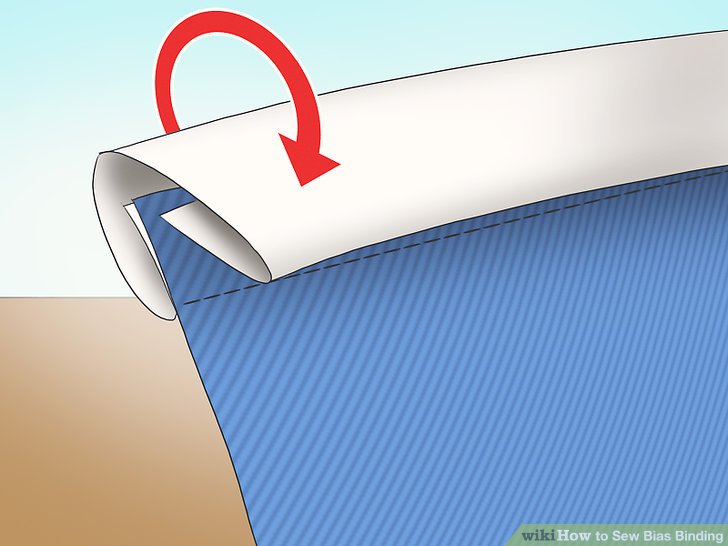
Since I didn't want to finish the waistband right then (I think I still had to buy a zipper), I decided to start the ruffle on the bottom. Ruffles are annoying (we will revisit later when making giant gold-dress ruffles...) because you have to make them like three times as long as the actual length because they will be gathered. Now, I HATE making circle hems. They are literally horrible because a circle doesn't fold in cleanly and every time I've ever made one it looked like crap. THUS A RECTANGLE RUFFLE. I just cut several long strips of fabric and folded in half length-wise. This created a nice edge at the bottom that I wouldn't have to finish. I had to cut several strips and sew them together to get enough length to do the entire bottom of the skirt (a 6 inch waist-radius plus, say, 24" for the length creates a bottom circumference of 188 inches! So...that's a lot of gathering.

Gathering is fun because hey, if your thread breaks you have to start over. I DO have a ruffle foot on my sewing machine (I think) but it wasn't working the way I needed it too. So I sewed two long basting stitches on the top edges and just pulled to gather. I basically kept adding strips until I had enough. Then my thread broke and I was super annoyed, so eventually I just kept folding tiny pleats into the seams and pinning and it looked almost the same, so I didn't care.

Also, I had seen in some photos that it looked like they had used white piping between the skirt and the ruffle. I thought this looked pretty so I decided to do the same -- I'd later add white lace on the very bottom edge to finish it. I layered my ruffle with the top edge meeting the bottom hem of the skirt, right sides together. This way I would fold the ruffle down and I could finish the ugly seams on the inside and nobody would see. I had to buy two packs of piping because it had to be so long...but eventually I got everything pinned and stitched -- yay! Now it was time to finish this raw edge on the bottom.

Lace! 
Piping looks so pretty!
I think by this time we had actually started music rehearsals for the show; and surprisingly, Belle doesn't actually sing in most of the ensemble songs. So I had a lot of downtime. Since I'm a glutton for punishment, I hand sewed the raw edges of the ruffle underneath. Essentially I just folded the edge of the skirt over itself and the other edges and tucked it under, kind of wrapping all the raw edges in to it, and I hand stitched it in place. It wouldn't show, so I really didn't care if it looked flawless, but I still didn't want raw edges hanging out where they might unravel, so at least this would keep everything in place. This took several days to finish, since I had down time but not TONS of down time.

Zippers are fun.
Once this was done, I had to buy a hugely long piece of delicate white lace for the very bottom. I think I bought something like ten yards ("Ten yards!") so I would have plenty enough with my huge spinny skirt. At first I thought about sewing this by hand but I quickly abandoned that plan because no. It took like three minutes to stitch it on with the machine. #bye
Clasps are fun too!

Last item was to finish the waist. I bought a 12 inch blue zipper (no need for a separating zipper this time.) But i needed it to be long enough so I could just unzip all the way and easily pull everything off and on in the midst of quick without risking ripping everything. This later proved helpful... I cut a seam down the back (since I only had two half-circle panels which met on the sides, there was no built-in seam already in the back.) folded the back edges over themselves twice to create a clean seam and then just sewed those to the zipper. I tucked the top edges into the waistband and finished the edges of that as well (basically just folded them inside themselves and sewed along the edge to seal it).  Last item to finish this thing up was adding some hook-and-eye clasps. I thought about using heavy duty snaps (in retrospect I probably would do that if ever doing this again) but I had a bad costume malfunction incident once, where I breathed and a snap unsnapped, leaving me a one-handed dancer while I held my skirt on. It was a stressful time. So clasps it was. I sewed two since I had such a wide waistband. Yay my beautiful skirt is complete!
Look at that beautiful spinny
skirt! *very wrinkled*


I think I'll include my apron-making in my next post since this one is shaping up to be a novel already. Until next time!


Monday, December 9, 2019

Strange but special

Previously on "Becca makes stuff", we saw Miss Becca ripping her hair out--sorry, ripping her SEAMS out because she bought cheap lining fabric and had to do THE WHOLE LINING OVER. But all is well in the corset world because now everything is lined up and pinned and (mostly) boned. (again with that word - we're all adults, right?)

A quick detour.
Myrtle Wilson is trash(y).
It was time to begin to finish this thing. However, I had to take a quick detour for another project - I FINALLY found a great Myrtle dress to use in The Great Gatsby; she needed something period but casual to wear in a quick scene before her "fancy" dress. I found a GREAT blue dress at Goodwill for like $4...but again with the quick changes. I didn't wanna risk this getting pulled over my head and messing up my wig (this change was REALLY fast -- I needed a quick out) so I cut the back open and added a quick zipper. Only took me an hour or so - zippers aren't THAT hard if it doesn't need to look perfect. 

Yay! All done and my awesome brother-friend Tyler was a ROCKSTAR getting me into costume lightning-fast every night! Now: back to Belle.

This is how bias tape works...you can buy it pre-folded but you
have to fold it yourself if you want to use the same fabric.
Let's go back to our bias tape. I adore the way bias tape looks; it all folds up nice and neat around the raw edges of your fabric to kind of tuck everything in. As I mentioned before, it's basically a long strip of fabric that has the raw edges folded in, and then the entire thing is folded in half (double fold bias tape). You basically completely unfold it, line it up on the outside of your garment (the side that will show), and sew the front edge on, then you fold it back around the line you just sewed and sew the back side (or the inside of your garment.) If you don't want any of your seams to show, you have to hand-sew your final tuck...which is what I did, because why not; I had loads of time and nothing else to make...(sense the sarcasm...)

My armpit bias tape was much wider
than my neckline...I was running out of fabric.
Also you can see my extra shoulder patch here.
(You can see on the fabric underneath how I pressed the
piping seams open but they didn't stay very well.)

It actually wasn't too bad, because I had a decent amount of downtime during Gatsby. I could bring my hand sewing and work on it in between scenes.  I decided to start with the inside edges of my center-back pieces. That way I could insert the steel boning back there and (hopefully) go ahead and put in the eyelets so I could lace up the back. 

I know I said center back but this is an
example of the center front...
So I went ahead and sewed the bias tape binding onto center back pieces. I figured I would use another piece to bind the top and bottom edges (I couldn't fold the top edges over because I needed to insert boning), so I just cut strips a little longer than my length. I sewed the outside "side", folded the bias tape around my edges and pinned on the inside "side". I used kind of a mix between a whip stitch and a blind stitch to hand stitch the inside edge of the bias tape. Basically I stitched through only the back two layers and took little tiny stitches so that you wouldn't really see the thread on the back (or at all on the front.) I inserted my final two bones to complete the center back pieces. 

I pinned all the sections together and tried to fit the whole thing one more time...I think everything was looking ok-enough? I knew the zippered side could/would modify the final fit (I could take a tuck in the side or add fabric if it was too big/small), so I went ahead and continued with my bias-tape edges around the front center edges, as well as the neckline. I left the bottom edge raw for now (the bottom edge would have to be fit with the zipper, but the top edge/neckline doesn't touch the side zipper, so I went ahead and sewed that in.)

(Note: I am writing like this all happened in a couple of days but truthfully this piece took several weeks to make. I brought it to Gatsby performances and hand sewed little by little until the bias tape was done.)

I can't remember which of
these colors I picked...
Now that I had some finished edges, I went ahead and took a trip to Joann to find some eyelets. Eyelets are the little metal holes that you basically hammer into a garment and it creates loops for lacing something up. They make them one-part or two-part. I wasn't sure what I'd need because while this was technically a "corset", it would only be laced snug to my body, and wasn't meant to be laced incredibly tightly like a real corset. So maybe they didn't necessarily have to be super heavy-duty?  I knew I'd need some on both sides of the front and back...and they came in two-part packs of 15 for $5. Or...they also had some one-piece eyelets for WAY cheaper. I wasn't sure how many I would do down the line of the piece, so I bought one pack of both. If the smaller/weaker ones were fine, I'd use those and save a little money. But...I was sick of going to stores and didn't wanna have to go back in case. I also picked up some lacing rope/string. (I actually had to go to several stores to find this in a close-enough color -- you'd be surprised by the difference in stock at all the different Joann stores...I could only find SUPER bright blue at first (I really wanted navy) but I eventually found it at giant Joann on Dobson/202. Estimated how much I'd need and I was ready to head home for more work. (I used a LOT of Joann coupons throughout the course of this...)

These are great - 2 (technically 3) part eyelets.
The kit comes with a little press to hammer onto.

I tested one of the cheap crap eyelets on a test swatch of fabric. Basically you cut a tiny hole in your fabric (THIS IS INCREDIBLY SCARY ON A PIECE YOU HAVE SPENT WEEKS MAKING) and you insert the teeth of the eyelet into the hole and hammer the back down to press the teeth around the fabric nicely. Well, the cheap crap eyelets were cheap and crap and they crumpled the moment I touched them. So...back to the drawing board. I guess I was spending like $20 on eyelets...I tested one of these two-sided versions on my test fabric and it did WAY better. This one had a front or "right-side" piece with teeth; you push the teeth through to the back, and then you loop a washer and a back metal piece on the back, then you hammer it down and the teeth loop around the back washer. So...I learned these were way better. (Also I chose a muted brass color to blend in better with my fabric, vs bright silver or gold.)


So. Many. Eyelets. (You can see they
are TOTALLY not perfect.)
So...we began the terrifying process of cutting holes in my beautiful corset. I decided on 12 eyelets for each side, so I measured and marked dots where I wanted to place each eyelet. I finally took the plunge and started cutting. I did NOT want these to fall out or break while I tossed this thing around onstage, so I hammered those eyelets in within an inch of their life...while hopefully still looking nice. This took quite a bit of time, so let's fast forward until all 24 had been set. I was finally able to pull the laces through the back side and connect these two pieces! 


One side is laced!!
This thing is actually starting to look decent!


Zipper is pinned!
I figured it was time to finally fit the silly old zipper. Unfortunately I had a heck of a time finding a 7" separating navy blue zipper. They just don't exist in stores, apparently. I needed it to separate, because...well otherwise, what good was it? Unfortunately most separating zippers are only made for jackets etc. So I decided I would get some zipper stops (this is a thing) and buy a longer zipper and just cut it and pin in place. So I got a really heavy duty strong 12" navy separating zipper and used pliers to remove the existing zipper stops. (The little metal pieces at the top of each side of the zipper that keep the zipper from running right out the top. I measured and cut it and then pried the stops back into place (which really wasn't terribly difficult, I just had to be careful not to break them with the pliers. They don't sell a lot of replacements...but now my zipper was sturdy and the right length and ready to go! With the front section pinned together, I wrapped the whole thing around me and pinned the zipper in place. I hesitated sewing it just yet (JUST in case things went awry once I did the corset lacing for the front. I fit it as well as I could, folded everything/hid all the seams, and stuck a lot of pins in it, so when it fit, I'd just have to sew two seams down each side of the zipper. 
Totally #nofilter #itsbluedahbahdee

Because of the timing; (I think it was showtime by now), I brought my lace and ribbon to Gatsby that day, it was time to hand-sew the lace trim onto the neckline of this thing. I pulled a navy satin ribbon through a piece of decorative lace (It looked super cute when it was all weaved in like that), and pinned to the very top of my piece. Because of how wide the lace was, I decided to sew on both side of the ribbon and give it two strong seams to hold to...unfortunately because of the boning, I couldn't stick the whole thing through my machine. I also used white thread and didn't want it to show through to the other side. So...I did this all by hand. Which took forever but I had time. It was kind of a soothing repetitive project that filled some of my downtime during the show. 

With the lace trim set in place (it took some effort to fold and sew the edges down; I wanted them to basically meet in the center seams but because it was two separate pieces I had to fold the ends down to get a clean seam), ALL I HAVE LEFT IS THE FINAL BATCH OF EYELETS! 

I also hand sewed these modesty
panels in the front and back.
ONLY EYELETS LEFT! (I really didn't
 put a bunch of filters on these photos. They
were just super dark so I tried to lighten them.)
Time to rinse and repeat the eyelets for the other side. Because of how many eyelets were in a pack, I decided to use only 10-11 (I can't remember) for the front side because I didn't want to buy a whole other box. Some hammering and pounding later....we have a totally laced corset vest! I had to use fray-guard for the ends if the lacing because they immediately started to unravel. I didn't want the lacing bows to show (I would just tuck them inside the piece) and I DEFINITELY didn't want them to unravel, so fray-guard was necessary.

The perfect cotton petticoat
 for napkin can-canning!
At some point in the middle of this project (and amidst my several hundred trips to Goodwill) I found a GREAT cotton petticoat at one of the Goodwills (Halloween stuff was finally coming out!) but unfortunately it was floor length. I didn't want to spend a whole bunch of money buying a petticoat for the dress online, and frankly I didn't need one more thing to make. So I bought this one for 7.99 and decided I would just take it up to become a knee-length petticoat. I hung it on my mannequin to create a pseudo-bottom for this outfit, and pinned it up for looks. 


FINALLY sewed the zipper in (this really didn't take long), finished the bottom edge of the bias tape, tried it on AND IT FIT!!! Honestly this is the best part...when you work your butt off to make something to fit you and it actually fits! and it was CUTE! I am DONE with this thing!!


With my cute cute $8 petticoat
A closeup

One piece down, ONLY A ZILLION TO GO!!!


Friday, December 6, 2019

She really is a funny girl...

Recap from my last post: we last left off with half an interfaced corset layer attempting a fit on my dressform. All is well, but lots more work to do.

A BLUE VEST! (Kinda.)
Once that side was "done", I sewed together the remaining pieces of the outer layer, so now we've got a three piece (one half and two quarters) corset that's haphazardly pinned together. If you recall, I am several inches taller than my mannequin, so I cut random strips of fabric to add length to the shoulder straps. Sewed it, pressed and called it a day. (Don't care, nobody will see).

It was time to make the lining or inside half of the vest. Originally I chose a solid navy (cheap) fabric. I figured this would make a nice contrast for the inside of the garment and I wouldn't have to spend more on pretty fabric. Who cares; nobody will see, right? So I cut and sewed all the pieces together, which didn't take THAT long because there was no piping on the inside.

However...even though I cut the exact same size pieces, my lining was somehow a little bigger than the outside layer, so it didn't lay flush with it. When I tried to line up each seam, width-wise, they wouldn't line up unless I pulled one side or the other and stretch it out a bit. Ok, I thought, well, maybe there should be a little extra to accommodate room for the boning channels. No matter. Let's move on.

(I'm going to use the  word "boning" a lot in this entry...use your best maturity...) Most corsets have boning, or strips/sticks of a hard steel or plastic that run up and down to create a firm kind of cage/shape and to hold your body in. PSA: PLASTIC BONING SUCKS. I have bought it several times in the hope that it wouldn't suck, BUT IT ALWAYS DOES. It's not even really any cheaper. It's just easier to cut because, well, it's plastic and a piece of crap. Don't ever use plastic boning.

Spiral steel boning - not as
 expensive as I thought!
Boning tips - this took two sets of
pliers to squeeze onto each bone.

I read a little about the different kinds of boning you can use and why one is better or worse. You can use spiral steel boning, which is nice because it's made of steel and very hard to bend or break, but it's also very flexible when it lays next to the curves of a human body. You can also use flat steel boning which is much more inflexible (and uncomfortable). It creates a very straight line that won't move, but because it really doesn't bend, it will not lie snug with your body (especially if you are curvy like me) and it can create a boxy look. Since I didn't want to test both right now, I went to Etsy and bought a roll of 1/2" spiral steel boning. You can buy it in pre-cut strips or in one long roll. The strips have to be cut to preset lengths, and since I didn't know exactly what those lengths would be...I bought a roll

Uncomfortable poke-y metal
When you buy it in bulk, you have to cut it yourself. (Luckily Dad has lots of tools.) You also have to put tips on the ends of each strip you cut. (when you cut each strip, it creates a very raw edge of uncomfortable poke-y metal that will easily rip through your cloth, so you apply smooth tips with pliers. I bought two dozen tips (one for each end of about the estimated 10-12 bones I'd use for this.

Now before I'd measure and cut each bone, I needed to create "boning channels" to sew into the lining. Because I was dumb and it was the only fabric I had (and the pattern told me to), I created my own pseudo bias tape with my pretty floral fabric, which took FOREVER. My channels were to be 5/8" wide (to accommodate 1/2" bones with a tiny bit of room, but so they'd still be snug.) so I cut 1" strips of fabric approximately the length of where I wanted to put them all.
Image result for make your own bias tape
Not my photo. (or my bias tape.)
But an example of what I did. (it takes forever.)
 

For these you basically fold in and press the two raw edges of the fabric strip, and then you sew the whole thing into your lining (hiding the folded-over edges) to create "channels" where you can slide the steel boning strips in and they will stay put. I created a couple of test strips which looked ok...but then it came time to cut and tip the actual bones.


Cutting steel is difficult, y'all. I borrowed metal snips from my dad, but even then it was difficult. With spiral steel boning, I learned that you basically just have to measure the length, and then cut one of the spirals on each side and it will snap apart. 

Metal snips...this hurt my hand. I am weak.
Tip both ends of each strip

Eventually I got the hang of it, but it was definitely a struggle for my tiny weak hands. After cutting, you use pliers to press the tip onto the end of the strip, squeezing the sides and top so it molds around the spirals and stays on.. This makes it smooth so it doesn't rip your fabric and poke into your sides.

So once I had done several of THOSE....I slipped each strip into the channels and held the whole garment up...and, uh-oh. Now my lining piece with all the boning channels was a good two inches smaller than my outside piece. As in, the sides did NOT match up even if I tried to pull at and stretch them. Somehow my POS navy fabric was pulling in all the wrong ways and was completely not sturdy. I think I had to start over. UHG.

All of this looks like crap. 
See how much it's pulling?


Yay for seam rippers
I have cut out these pieces 5 gazillion times now.


I knew it would be better in the long run if I used a sturdier/thicker lining fabric....so back to the drawing board. I decided to use my actual nice fabric because, why not, right. So after cutting out all the pieces AGAIN (surprise, I actually had enough fabric left over!) and sewing them together and ripping all the boning channels out of my navy lining and sewing them BACK into the nicer lining...things looked a lot better. (sewing takes a long time...)


My hands hurt a lot after all this.
I finished all of the boning channels and cutting all the bones (side note, make your boning channels end about 5/8" from the top and bottom edges of your fabric to leave room for the seam allowance and to finish the edges of the piece. If you don't leave enough room and your steel goes all the way to the edge you can NOT put it under a sewing machine needle. Leave plenty of room to finish all your edges.) Everything was laid out and lining up ok! Fixed my shoulder pieces, added length for my tall-ness, pinned the lining to the outer piece, held it up on me, and things were looking...acceptable! This thing is getting closer to becoming one piece!

IT LINES UP SO NICELY
 (Side note, I had not yet added the boning for the center front and center back pieces where the lacing would go. There would eventually be bias tape to around the raw edge to create those last boning channels, and I wasn't sure on final fit yet. The final bones would go right into the edges of the pieces, so when the laces were pulled tight, it wouldn't stretch the outer edge of each piece; the boning would hold it sturdy.)

I created a TON of double-fold bias tape because the entire piece would be finished in it (neckline, waistline, armholes, center seams...). So I cut a hugely long strip of fabric and took forever pressing the sides It was worth it though because you don't have to try and fold seams in and it finishes quite nicely if you do it right. You won't see any thread lines on the outside either (which was great because this thing was multiple shades of blue, so the thread color I chose would always show somewhere.)

Look how nicely bias tap finishes this shoulder edge.

I bias-taped the right-side arm hole (couldn't do the left side yet because it would have a zipper in the middle and I didn't yet know the exact sizing) but that made the edge look nice and pretty. I got to my next stopping point, because frankly I was wiped. (However, I had found the lace and trim I wanted to use! I once again draped it on the neckline and it looked SO PRETTY!  (I have this thing about reaching a stopping point and I have to hang stuff on my mannequin so it looks like it's some stage of finished...even though it's not.)

This looks totally finished (not.)


Next up: (hopefully) finishing the blue corset vest!


Wednesday, December 4, 2019

A Most Peculiar Mademoiselle

I've never made a corset before, as much as I adore them and the way they look. I have read a number of corset-making tutorials by people who have far more advanced skills than me, and whose efforts look much more professional and picture-perfect than I could ever hope to achieve....but we all have to start somewhere, right?

I began this effort on my long Fourth of July weekend. (Sewing is much easier when you can commit to a whole day in the sewing room, instead of a couple of hours.) After a carpet-soaked adventure having to buy a new water heater ON the Fourth of July...my sewing room had dried out enough for a project!

I wanted a lace-up corset vest that I could tighten or loosen (I had been working on myself for a few months now and dropped a couple of inches...so this thing should be adjustable in case I had good luck and got even smaller!) I didn't want it to be too big, so I figured I would err on the side of "a little too small" when laced all the way, that way I could slightly loosen the laces.

Image result for butterick corset pattern B5662I haven't really sewn a ton of garments, so I knew I'd need a pattern. A corset would have lots of pieces and I needed guidance. I chose pattern Butterick B5662 (version D). It was a fully-lined, fully BONED corset vest that goes over the shoulders, that laces in both the front and the back. It's cut low enough that you'd be able to see the blouse underneath, and it's "plain" enough that it doesn't need to look like a vaudeville burlesque show. No corset busk, but just lacing on both sides to hold it together. However...having read the Beauty and the Beast script and done the show years ago, I know that ALL of Belle's costume changes are pretty lightning fast...which does not bode well for corset-lacing. There just isn't time. A few modifications will definitely need to be made.

So, after looking at the construction of this vest, I decided I would add a sturdy side zipper for getting in and out. That way I could keep the corset laced tight but still get it on and off with relative ease. I could loosen the lacing if I had to, but wouldn't have to completely lace or unlace it.

I also decided that I was going to need to modify the length of it. From the photos, this pattern clearly comes all the way down your hips and I needed it to cut more to the waist. Enough to cover the skirt waistband completely (without showing skin when your arms are raised) but short enough so it didn't restrict movement. (Also, as a true hourglass shape, nothing cut at the hips is flattering for me. I can be smaller or bigger, but my waist will always be smaller than my hips, so anything that is cut at the waist is WAY more flattering.)

Isn't it pretty???
I needed to find a pretty fabric. I'm thinking cotton, because it doesn't need to stretch and needs to be fairly sturdy to withstand being pulled by the corset boning. I wanted something that had a bit of pattern and frilly-ness without being super overwhelming (probably floral?). Something that was a little more than just plain blue, but still not over the top, and still had the "pure" bright blue color I was looking for without it being neon. (Something I could combine with a skirt and have it not clash or look odd.) I ended up at Hobby Lobby and found some pretty blue floral cotton for about $4/yd (with my 40% off coupon!) I figured I would use a different fabric for the lining, so I bought 2 yards, as well as some navy blue piping trim (not part of the pattern, but my inspiration photos used piping, and it's so pretty!) and some blue thread.


Image result for interfacingI also picked up some interfacing fabric. Interfacing is a kind of stabilizing fabric that you can put in between layers to give your garment a little more sturdiness. With a corset, I knew I'd need it. The pattern called for it, and I knew that stage costumes get thrown around a decent amount, so I wanted it to be really sturdy. With grommets/eyelets for the lacing, it also helps the fabric not to rip. It means you have to cut out double the pattern pieces, but it's worth the extra work. It creates that middle layer that allows everything to hold together. Also it's super easy to iron on; it has a "right side" and a "wrong side"; you just fuse the wrong side to the back of your fabric and it really just reinforces everything.


Fabric is folded at the top. Double pieces!
 (You can see where I took in the length of each piece.)
I cut out all the pattern pieces from the giant piece of thin paper (patterns are hard, y'all) and estimated the length I would need to adjust by holding them on myself and also on my dressform (which is SUPER helpful but still not exactly my shape or size, so modifications still needed to be made.) I folded each piece to accommodate the length (didn't wanna cut them in case I ever wanted to use this pattern again, also since the edges are curved, I had to make the adjustment in the middle of all the pieces) and pinned them up on my fabric. (Measure twice, cut once.)

(Side note: I'm not a hundred percent sure why,
but patterns instruct you to line up your pattern pieces with the fold/grain of the fabric so they "pull" the right way and don't have weird tucks or stress on the fabric. I'm not a professional, so I did what they said. Also, fold the fabric in half so you get the mirror image pieces so your right side matches your left. You only have to cut out half as many that way.)

This pattern also has modestly panels in the front and
back (top right and left pieces) to cover any gaps in the lacing.
I lined my pieces up in order and hey, it looks like half a corset vest! I figured eventually I would have to build a zipper into one side, so I would have to leave that side seam open. That meant I would have to build this thing in three separate pieces, as it was only laced together. So, since I chose to put the zipper on the left side, I'd build the front left which would connect to the back left (via zipper and shoulder strap) which would lace to the entire right side which would lace around to the front left. Since the right side would be the biggest piece, I chose to baste that entire side together first.

But before I did, I lined up the pieces on my mannequin to check the fit, and (of course) the waist was seemingly too big and it was a little bulky-looking. I took some tucks in several pieces and lined it up again. (THIS IS THE HARDEST PART OF FITTING STUFF ON YOURSELF. You can't just pin a million pieces of fabric on your body and hope they fit once you sew them together.) I pinned the pieces to each other and held up the side on my side (hoping the seam allowances were correct; you have to take into account an extra 1/2"-1" on each piece, depending on how wide your seams are)

Right front side
Right back side
As you can see from the photos, I had to modify some of the pieces quite a bit. Also, I later learned that my torso is a good 2-3 inches TALLER than my mannequin. When I put the piece on myself and lined it up with my waist, the shoulder straps didn't even touch....which is bad if I still need an extra inch for the seam. So I later had to add several inches to each shoulder strap. It wasn't as clean as I wanted (there was an extra seam), but I was too lazy to cut out a whole other piece that was longer. Plus I didn't want to waste fabric. It also meant it sat a little lower on me, so it didn't cut so high in the armpits, which was totally fine with me. I had to take into account there would be a blouse underneath and I didn't want it to cut into my shoulders or armpits and look too small.

The fan was for drying the carpet...
Piping is pretty!
 Before I started sewing, I ironed on my interfacing pieces to my fabric pieces. Iron-on interfacing is great, because you just heat it and then it sticks to your fabric so you have just a stiffer, sturdier piece of fabric. I figure I could cut off whatever extra there was, but this would help the outer layer to be nice and sturdy.

I was already loving the color contrast of the navy piping and the lighter blue fabric. I knew I eventually wanted some sort of lace/ribbon trim around the neckline, so I planned to incorporate the navy that way as well. Likely I would also do navy lacing? That way we have a host of blues to match the skirt to!

I finally took the plunge and sewed one side of pieces together, lining up and pinning the fabric/interfacing and laying out the piping trim inside both pieces, so when you unfold it, it shows between the seams. Piping can be difficult, but as long as you sew the seam right up next to the piping, it peeks out just right. I was just hoping I wouldn't have to adjust the fit and unpick any of these seams. Seam rippers are great, but it takes FOREVER. 

I used a 1/2" seam (meaning you sew 1/2" from the edge of the fabric), which is pretty wide, but it allows you to be able to press the seams open and still have it lay pretty flat. I knew that I'd be putting boning channels on the inside so I didn't want it to be any bulkier than it had to. However, the piping made it difficult to press the seams open since it wouldn't really lay to one side or the other. Oh well. This garment would be fully lined, meaning you basically make the layers twice (one inside-out) and have the nice sides lay facing out and all the ugly seams get sewn up on the inside so they aren't seen. I don't own, nor have I ever used a serger machine, which ties up and cuts all of your seams nicely so it looks professional, so the more seams I could hide, the better.

I laid out my right side piece on both my mannequin and myself. So far, so good? The fit was a tiny bit big, but I figured I could cut a little off the center edges if I needed to. The whole thing would be finished with bias tape, meaning it's basically fabric that wraps around the outside seams, so there is no need for a seam allowance on those edges.  I tried to line up the piece with the exact middle of my mannequin, so all I would need to do would be to create the mirror image pieces for the other side. Unfortunately I forgot to mark which pieces I totally adjusted and altered (I just sewed the seams smaller and cut off the excess) so I would have to eyeball it again for the left side. I also left piping out of the very middle side seam (you can see from the below photos that it's missing on one seam). Since I would have the zipper on the other side, I wanted them to match. Also this would make it much easier in case it didn't fit and I needed to adjust the sides; I wouldn't have to deal with unpicking piping too.

With my one half laid on my dressform, I draped some fake lace on it for fun, to get an idea of how it might look when finished, and I'm already in love! The blouse and apron would be stark white, so I was loving the thought of white lace trim to contrast with the blue colors. Everything is looking great so far!


I am loving this so far!
Maybe there is hope for me?


More to come: Belle's Blue Corset Part 2!